Snow Ice Cream Recipe: 5 Magical Ways to Make Winter Treats
Imagine a dessert that’s creamy, sweet, and melts in your mouth like a snowy dream. That’s what you get with this snow ice cream recipe! It’s the perfect way to turn a chilly day into a fun, flavorful adventure. Picture this: years ago, I was a kid bundled up in a snowsuit, scooping fresh snow with my grandma, giggling as we turned it into a treat sweeter than any store-bought ice cream. That’s the magic of snow ice cream—it’s simple, quick, and brings out the kid in everyone.
What makes this snow ice cream recipe so special? It’s ridiculously easy—just a handful of ingredients and about 10 minutes of your time. Plus, it’s a family-friendly hit that gets everyone involved, from scooping snow to adding toppings. If you loved our , you’ll adore this winter twist—it’s just as creamy but with a frosty flair. So, grab your mittens and a bowl, because this snowy treat is calling your name. Ready to make some winter magic? Let’s dive in!
What is a Snow Ice Cream Recipe?
So, what’s the deal with this thing called a snow ice cream recipe? Is it just snow with a fancy name, or some secret chef trick? Nope—it’s literally fresh snow mixed with a few kitchen staples to make a chilly, creamy dessert! Legend has it, folks started making this back when freezers weren’t a thing, turning snow into a sweet escape. I mean, who wouldn’t want to eat snow that tastes like vanilla heaven? It’s like the saying goes, “The way to a man’s heart is through his stomach”—and this recipe proves it, one snowy spoonful at a time. Go on, give it a whirl—you won’t regret it!
Why You’ll Love This Snow Ice Cream Recipe
This snow ice cream recipe is a winter game-changer, and here’s why it’ll steal your heart:
- The Main Highlight: It’s pure fun! Scooping snow and mixing it into a creamy treat feels like a mini snow day party. The texture is light and fluffy, with a melt-in-your-mouth vibe that’s irresistible.
- Cost-Saving Benefits: Why buy pricey ice cream when you’ve got free snow outside? With just milk, sugar, and vanilla—stuff you probably already have—you’ve got a dessert that’s cheap and cheerful.
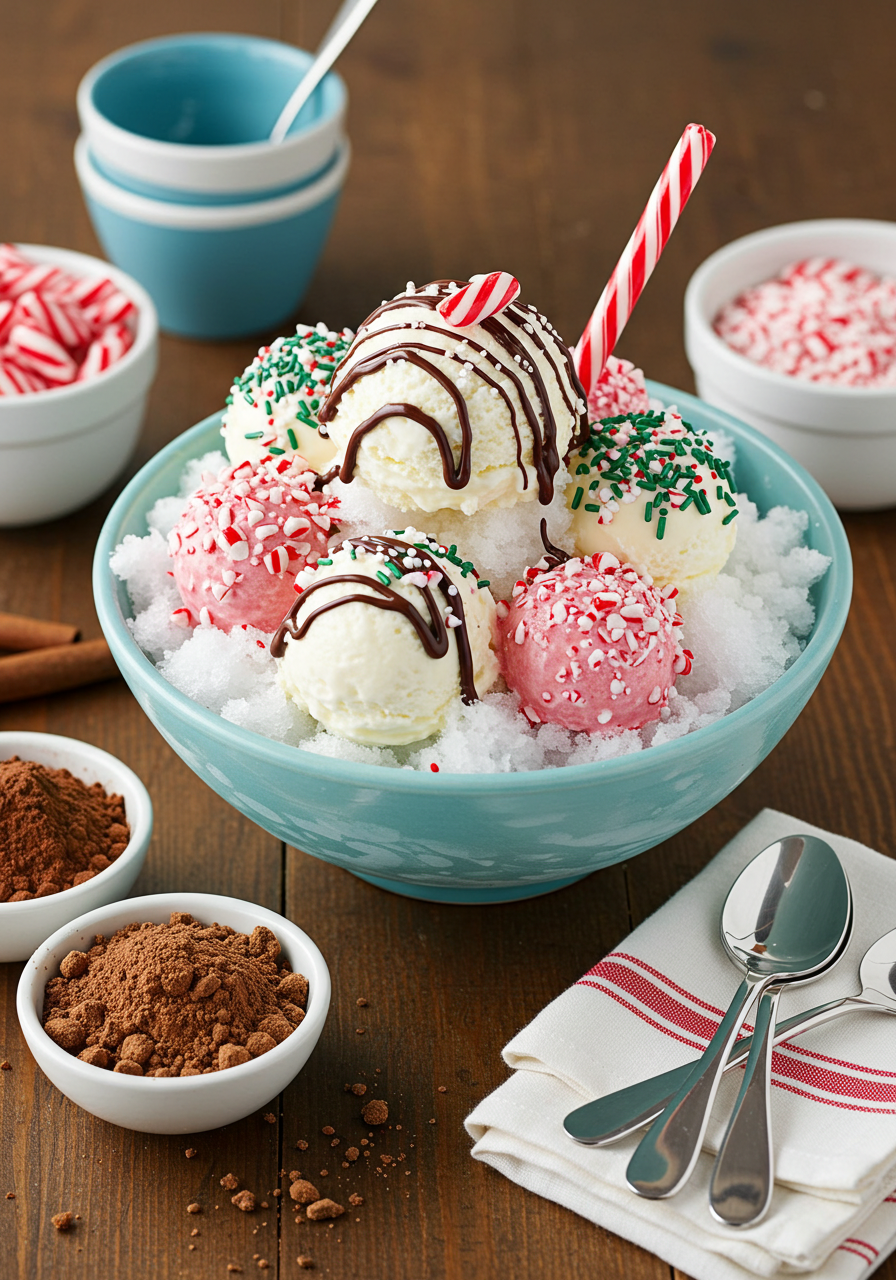
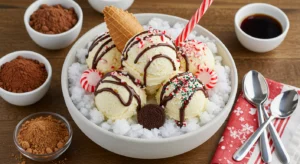
- Flavorful Toppings: Oh, the toppings! Drizzle on some chocolate syrup, sprinkle some crunchy candies, or toss in fruity bursts—these extras make every bite a flavor explosion.
If you’re a fan of our , this snowy version takes that simplicity up a notch with nature’s help. Trust me, once you try it, you’ll be hooked. So, why not whip up a batch and see for yourself?
How to Make a Snow Ice Cream Recipe
Quick Overview
This snow ice cream recipe is your ticket to a quick, delicious treat that’s as satisfying as it gets. It’s all about simplicity—just snow and a few basics—and the result is a creamy, dreamy dessert with a frosty twist. The standout? That fresh snow texture you can’t fake! Plus, it’s ready in under 10 minutes, making it perfect for a spontaneous snow day snack.
Key Ingredients for Snow Ice Cream Recipe
Here’s what you’ll need to whip up this winter wonder:
| Ingredient | Quantity | Notes |
|---|---|---|
| Fresh, clean snow | 8 cups | White and fluffy, no dirty stuff! |
| Milk | 1 cup | Whole, 2%, or even almond milk |
| Granulated sugar | 1/3 cup | Adjust to taste if you like |
| Vanilla extract | 1 teaspoon | For that classic ice cream flavor |
Caption: Everything you need for a magical snow ice cream recipe!
Step-by-Step Instructions
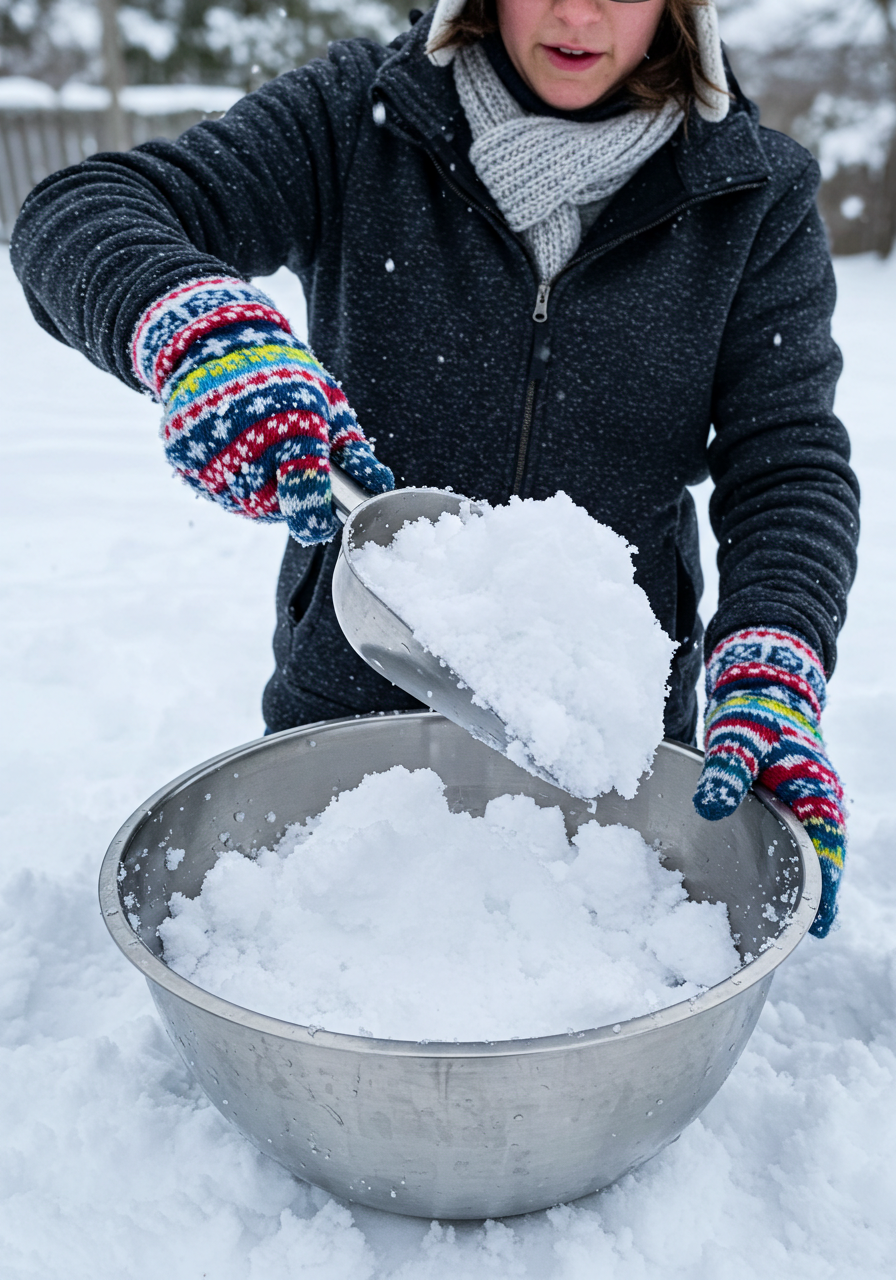
- Scoop the Snow: Grab a big bowl and head outside. Scoop up 8 cups of fresh, clean snow—look for the fluffy, untouched stuff. Bring it inside fast so it stays cold!
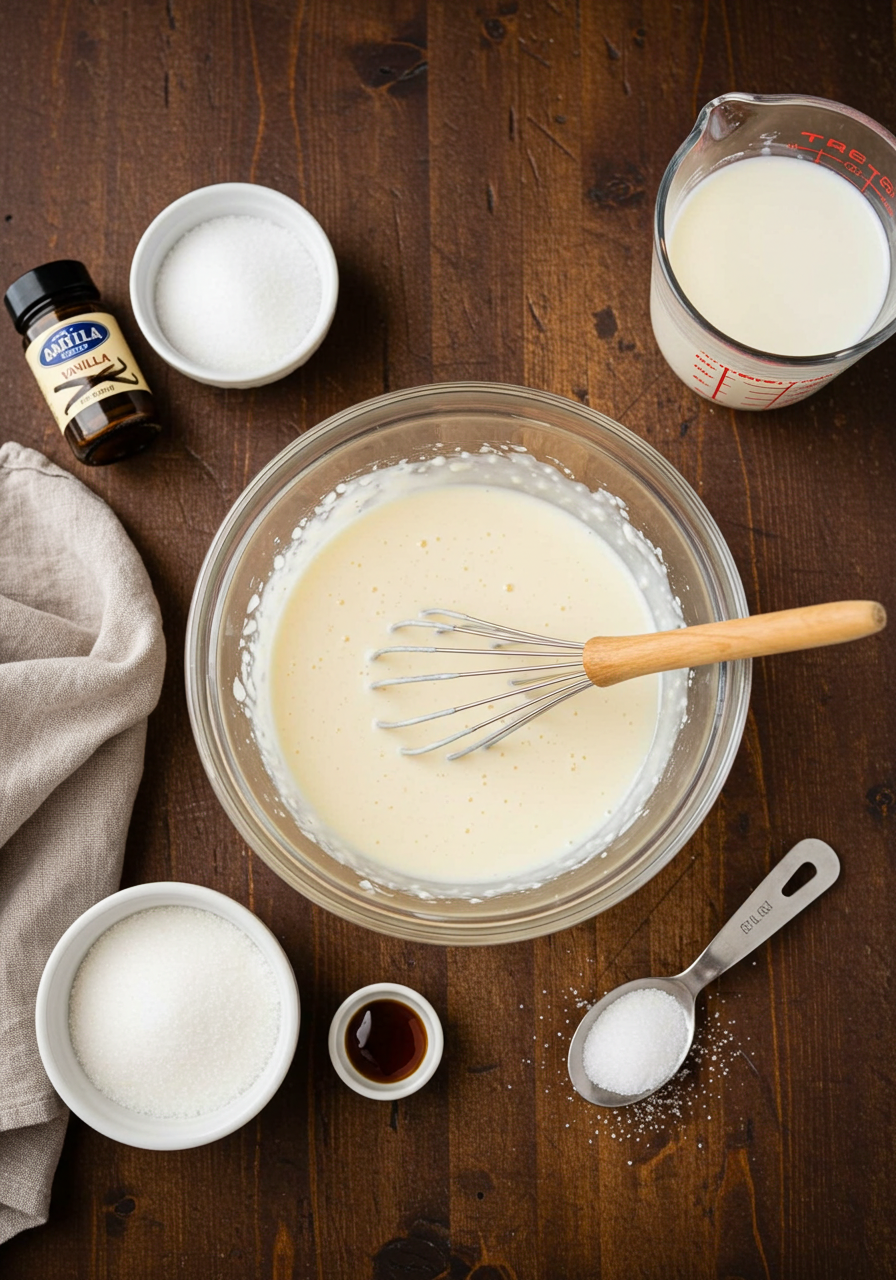
- Mix the Base: In a separate bowl, whisk together 1 cup of milk, 1/3 cup of sugar, and 1 teaspoon of vanilla extract. Stir until the sugar dissolves completely—this is your sweet magic potion.
- Blend It Up: Pour the milk mixture over the snow. Gently stir with a big spoon until it’s creamy and combined. Don’t overmix, or it’ll turn slushy!
- Add Your Twist: Here’s where the fun begins! Try one of these five magical variations:
- Chocolate Bliss: Swap vanilla for 2 tablespoons of cocoa powder.
- Berry Blast: Drizzle in 2 tablespoons of strawberry syrup.
- Candy Crunch: Toss in a handful of crushed peppermint candies.
- Cinnamon Dream: Sprinkle 1/4 teaspoon of cinnamon.
- Cookie Craze: Mix in 1/4 cup of crushed chocolate chip cookies.
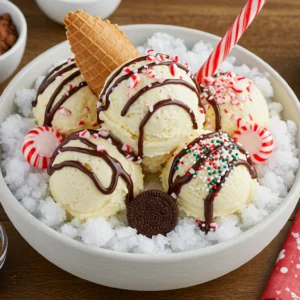
- Serve Immediately: Scoop into bowls and enjoy right away while it’s frosty and fresh!
What to Serve Snow Ice Cream Recipe With
This snow ice cream recipe is a star on its own, but pairing it with a few goodies takes it to the next level. Try serving it with warm for a cozy contrast—the heat melts the ice cream just a little, making it extra creamy. Or, pair it with crispy sugar cookies for a crunchy bite that balances the softness. Want something lighter? A cup of herbal tea, like peppermint or chamomile, complements the sweet flavors perfectly. Mix and match to make your snow day meal unforgettable!
Top Tips for Perfecting Snow Ice Cream Recipe
Want your snow ice cream recipe to shine? Check out these handy tips:
- Chill Your Tools: Stick your mixing bowl and spoon in the fridge beforehand to keep the snow from melting too fast.
- Snow Check: Only use fresh, white snow—skip anything yellow or gritty (you know why!).
- Flavor Boost: If it’s not sweet enough, add an extra tablespoon of sugar or a splash more vanilla.
- Substitutions: No milk? Try cream for a richer taste, or use coconut milk for a dairy-free twist.
- Avoid Overmixing: Stir just until combined—too much mixing makes it watery.
These tricks work whether you’re a newbie or a kitchen pro!
Storing and Reheating Tips
Snow ice cream is best enjoyed fresh, but if you’ve got leftovers, here’s the scoop. Store any extra in an airtight container in the freezer for up to a day—it’ll harden a bit but still taste good. Don’t keep it longer than that, though; the texture gets icy fast. To “reheat,” let it sit out for a minute to soften, then give it a quick stir. Freezing for future meals isn’t ideal since fresh snow is the star—better to make a new batch when the next snowfall hits!
Ingredients Table
| Ingredient | Quantity | Notes |
|---|---|---|
| Fresh, clean snow | 8 cups | White and fluffy, no dirty stuff! |
| Milk | 1 cup | Whole, 2%, or even almond milk |
| Granulated sugar | 1/3 cup | Adjust to taste if you like |
| Vanilla extract | 1 teaspoon | For that classic ice cream flavor |
| Optional toppings | Varies | Cocoa, syrup, candies, etc. |
Here are three Amazon products to help you make the perfect snow ice cream at home: ❄️🍦
- Snow Cone Machine – For finely shaved ice, just like fresh snow!
🔗 Amazon Link - Sweetened Condensed Milk – The key to creamy, sweet snow ice cream.
🔗 Amazon Link - Pure Vanilla Extract – Adds rich flavor to your homemade treat.
🔗 Amazon Link
Snow Ice Cream Recipe: 5 Magical Ways to Make Winter Treats
Equipment
- 1 Large mixing bowl Use a stainless steel or glass bowl for best results. Chill it beforehand if possible.
- 1 Small mixing bowl For preparing the milk, sugar, and vanilla mixture.
- 1 Whisk or spoon To mix the sweet base until sugar dissolves.
- 1 Measuring cups and spoons For accurate measurements of milk, sugar, and snow.
- 1 Spatula or large spoon To gently fold the snow into the sweet base without overmixing.
- Optional Airtight container For storing leftovers (if there are any!).
Ingredients
- 8 cups Fresh, clean snow Use freshly fallen, white, fluffy snow. Avoid dirty or yellow snow.
- 1 cup Milk Whole milk is ideal, but 2%, almond milk, or any milk works too.
- ⅓ cup Granulated sugar Adjust to taste if you prefer it sweeter.
- 1 teaspoon Vanilla extract Pure vanilla extract gives the best flavor, but imitation works fine too.
- Optional Varies Toppings Examples: chocolate syrup, crushed cookies, sprinkles, or fresh berries.
Instructions
Scoop the Snow
- Head outside and gather 8 cups of fresh, clean snow in a large mixing bowl. Look for fluffy, untouched snow—avoid any yellow or dirty patches. Bring it inside quickly to keep it cold while you prepare the rest of the recipe.
Prepare the Sweet Base
- In a small bowl, whisk together 1 cup of milk , 1/3 cup of granulated sugar , and 1 teaspoon of vanilla extract until the sugar dissolves completely. Taste the mixture and adjust the sugar if you’d like it sweeter.
Combine the Snow and Base
- Pour the sweet milk mixture over the snow in the large bowl. Using a spatula or large spoon, gently fold everything together until the snow is evenly coated and the texture resembles soft-serve ice cream. Be careful not to overmix, or it may turn slushy.
Add Your Favorite Toppings (Optional)
- Customize your snow ice cream with toppings like chocolate syrup , crushed cookies , sprinkles , or fresh berries . Drizzle, sprinkle, or mix them in as desired to create your perfect winter treat.
Serve Immediately
- Scoop the snow ice cream into bowls or cones and enjoy right away while it’s still frosty and fresh. If you have leftovers, store them in an airtight container in the freezer, but note that the texture may harden over time.
Notes
-
Snow Safety First:
Always use freshly fallen, clean snow that is free from dirt, debris, or animal tracks. Avoid snow near roads or industrial areas to ensure it’s safe to eat. -
Customize the Sweetness:
Adjust the sugar to your taste. Start with 1/3 cup and add more if you prefer a sweeter treat. Alternatively, reduce the sugar for a less sweet version. -
Milk Options:
- Use whole milk for a creamier texture.
- For a lighter option, try 2% or skim milk.
- For a dairy-free version, substitute with almond milk, oat milk, or coconut milk.
-
Flavor Variations:
Get creative with these fun twists:- Chocolate Lovers: Add 2 tablespoons of cocoa powder to the milk mixture.
- Fruity Fun: Stir in 2 tablespoons of strawberry or raspberry syrup.
- Spiced Delight: Sprinkle in 1/4 teaspoon of cinnamon or nutmeg for a cozy flavor.
-
Topping Ideas:
Elevate your snow ice cream with toppings like:- Drizzled chocolate or caramel sauce.
- Crushed cookies (e.g., Oreos or graham crackers).
- Fresh berries or banana slices.
- Sprinkles or crushed peppermint candies for festive flair.
-
Serve Immediately:
Snow ice cream is best enjoyed fresh. If you need to store leftovers, place them in an airtight container in the freezer, but note that the texture may become icy after a few hours. -
Kid-Friendly Activity:
Let the kids help scoop the snow and mix the ingredients—it’s a fun way to make memories on a snowy day! -
Allergy-Friendly Tips:
- Ensure all ingredients (like vanilla extract) are allergen-free if serving to someone with sensitivities.
- Use plant-based milk for a vegan-friendly version.
-
No Snow? No Problem:
If you don’t have access to clean snow, you can mimic the texture by freezing shaved ice or blending ice cubes until they’re fluffy.
What do you think of this recipe? 😋
There are no reviews yet. Be the first one to write one.
snow ice cream recipe
"A magical snow ice cream recipe that transforms fresh snow into a creamy, dreamy winter treat! With just milk, sugar, vanilla, and optional toppings, this fun, family-friendly dessert is perfect for snowy days. Quick, easy, and utterly delicious!"
Type: Dessert
Cuisine: American, Homemade
Keywords: Snow ice cream recipe, winter treats, no-cook desserts, snow day recipes, homemade ice cream, fun desserts for kids, easy snow ice cream
Recipe Yield: 4 servings
Calories: ~100 calories per serving (base recipe)
Preparation Time: PT5M (5 minutes)
Cooking Time: PT0M (No cooking required)
Total Time: PT10M (10 minutes total, including prep and assembly)
Recipe Ingredients:
- (Listed earlier in the post as a table: snow, milk, sugar, vanilla extract, optional toppings)
Recipe Instructions: (Listed earlier in the post as a table: snow, milk, sugar, vanilla extract, optional toppings)
4.8
Pros
- Quick and easy to make with minimal ingredients.
- Fun activity for kids and families on snowy days.
- Customizable with endless topping options.
- No special equipment or baking required.
- Perfect for satisfying sweet cravings on a budget.
Cons
- Requires access to clean, fresh snow.
- Best enjoyed immediately; texture may change if stored.
- Not suitable for areas without snowfall.